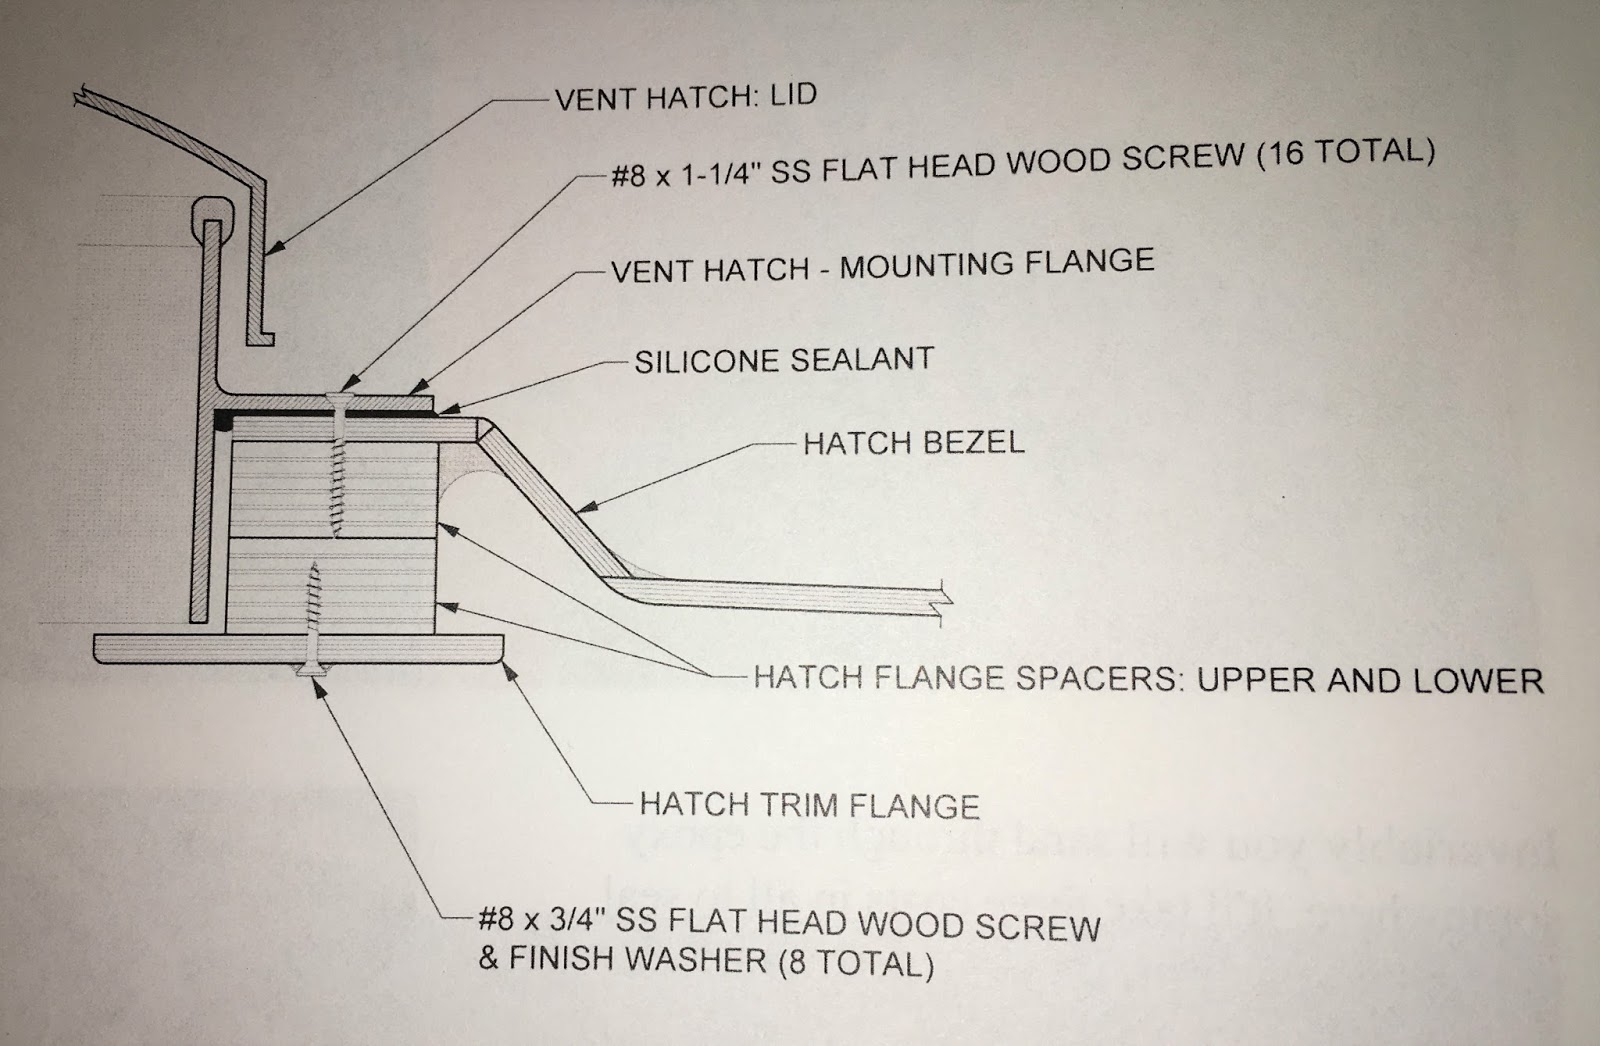
A spacer is attached to the inside of the hatch to provide material for the ventilator fan screws and for placement of a trim flange below the fan--to give it a more finished look. Here is a diagram from the manual showing a cross-section of the spacer and trim flange:
This diagram might make more sense after you see the following pictures. The hatch flange spacers are made from two pieces of plywood that must be glued together to become thick enough.
The spacers are shown glued and clamped. I brought them inside the house later to cure.
The trim flange is shown here--lying on top of the spacers for demonstration.
This shows the spacers glued and clamped to the underside of the hatch.
⬉ There is a small opening for the fan power wiring which the arrow is "sort of" pointing to. The manual says nothing about it. I decided to orient it on the port side toward the rear of the camper, where the battery will be mounted. (This application does not seem to provide for adding arrows and so on to pictures. If I really need to do that in future I'll use an editing program to draw them first.)
A view of the clamped spacer from above the hatch.
Since I am having to heat the inside of the camper to cure the spacer, I took this opportunity to also finish filleting the top edge of the cabin shelf.
I have set up a folding table in the kitchen for small epoxy jobs. Here, the trim flange has received its first coat.


When did you cut the hatch opening? The manual doesn’t mention it. Do you use the spacer as a guide for where to cut earlier?
ReplyDelete