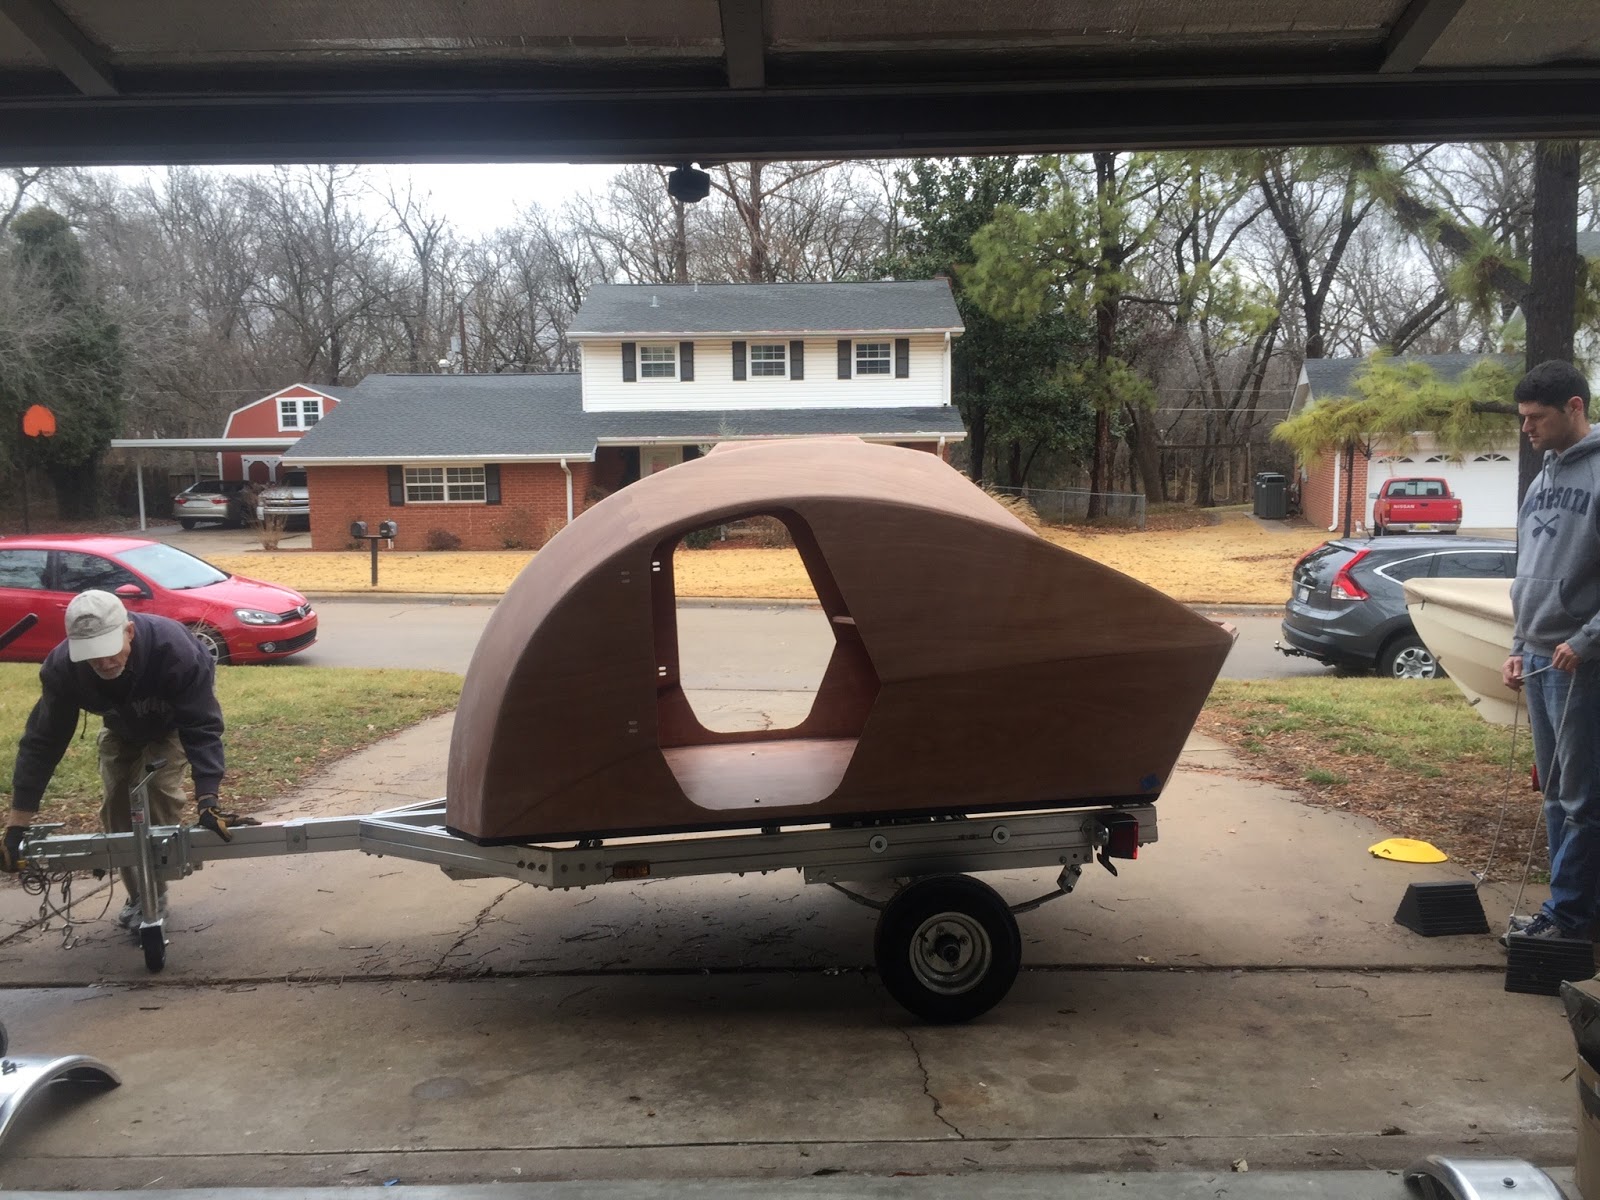
A major milestone was reached today. My dear friends from Lawton, Andi and Andy (Andrea and Andrew) Kley were here and they helped me mount the camper shell on the trailer and bolt it in place. Andi shot the first four pictures, so that's why she's not in them not in them. Believe me, though, she provided a major part of the labor.
So here Andy and I are moving the trailer in place in front of the garage.
Here the camper shell is sitting on the trailer and we'll be aligning it and putting three or four bolts loosely in place to keep it from sliding around. Andi obviously couldn't get any pictures while we were all busy placing the camper on the trailer, etc.
After the shell was secure I rolled the tongue around the other way so we could pull the trailer forward into the garage.
After securing all the spacers and bolts I finally realized I needed to be shooting some pictures. Andy and Andi are busy building a similar camper in Lawton. They are also producing a blog on their project. See it at:
http://offtimeprojects.blogspot.com/
Tips for builders:
One of the problems with placement of the mounting hole is that the
captive bolt and nyloc nut prevent you from getting any kind of
alignment tool in there plumb. My solution was to mark the positions of
the the brackets and temporarily remove them. Then I was able to
realign the brackets up against the shell with the bolts and nuts out of
the way. I used a 3/8″ Forstner bit to mark the center of the hole. I
then moved the bracket out of the way and drilled a 1/16″ hole all the
way through. Following this, the 1/2″ “fill” hole can be drilled,
partway from the bottom and finishing from the top. (In my case, I
drilled a 5/8″ hole instead, for added assurance that I would not hit
any raw wood when drilling the final 3/8″ hole.) When it comes time to
drill the 3/8″ hole, Forstner bits are very helpful for finding the
center of the thickened epoxy plug.
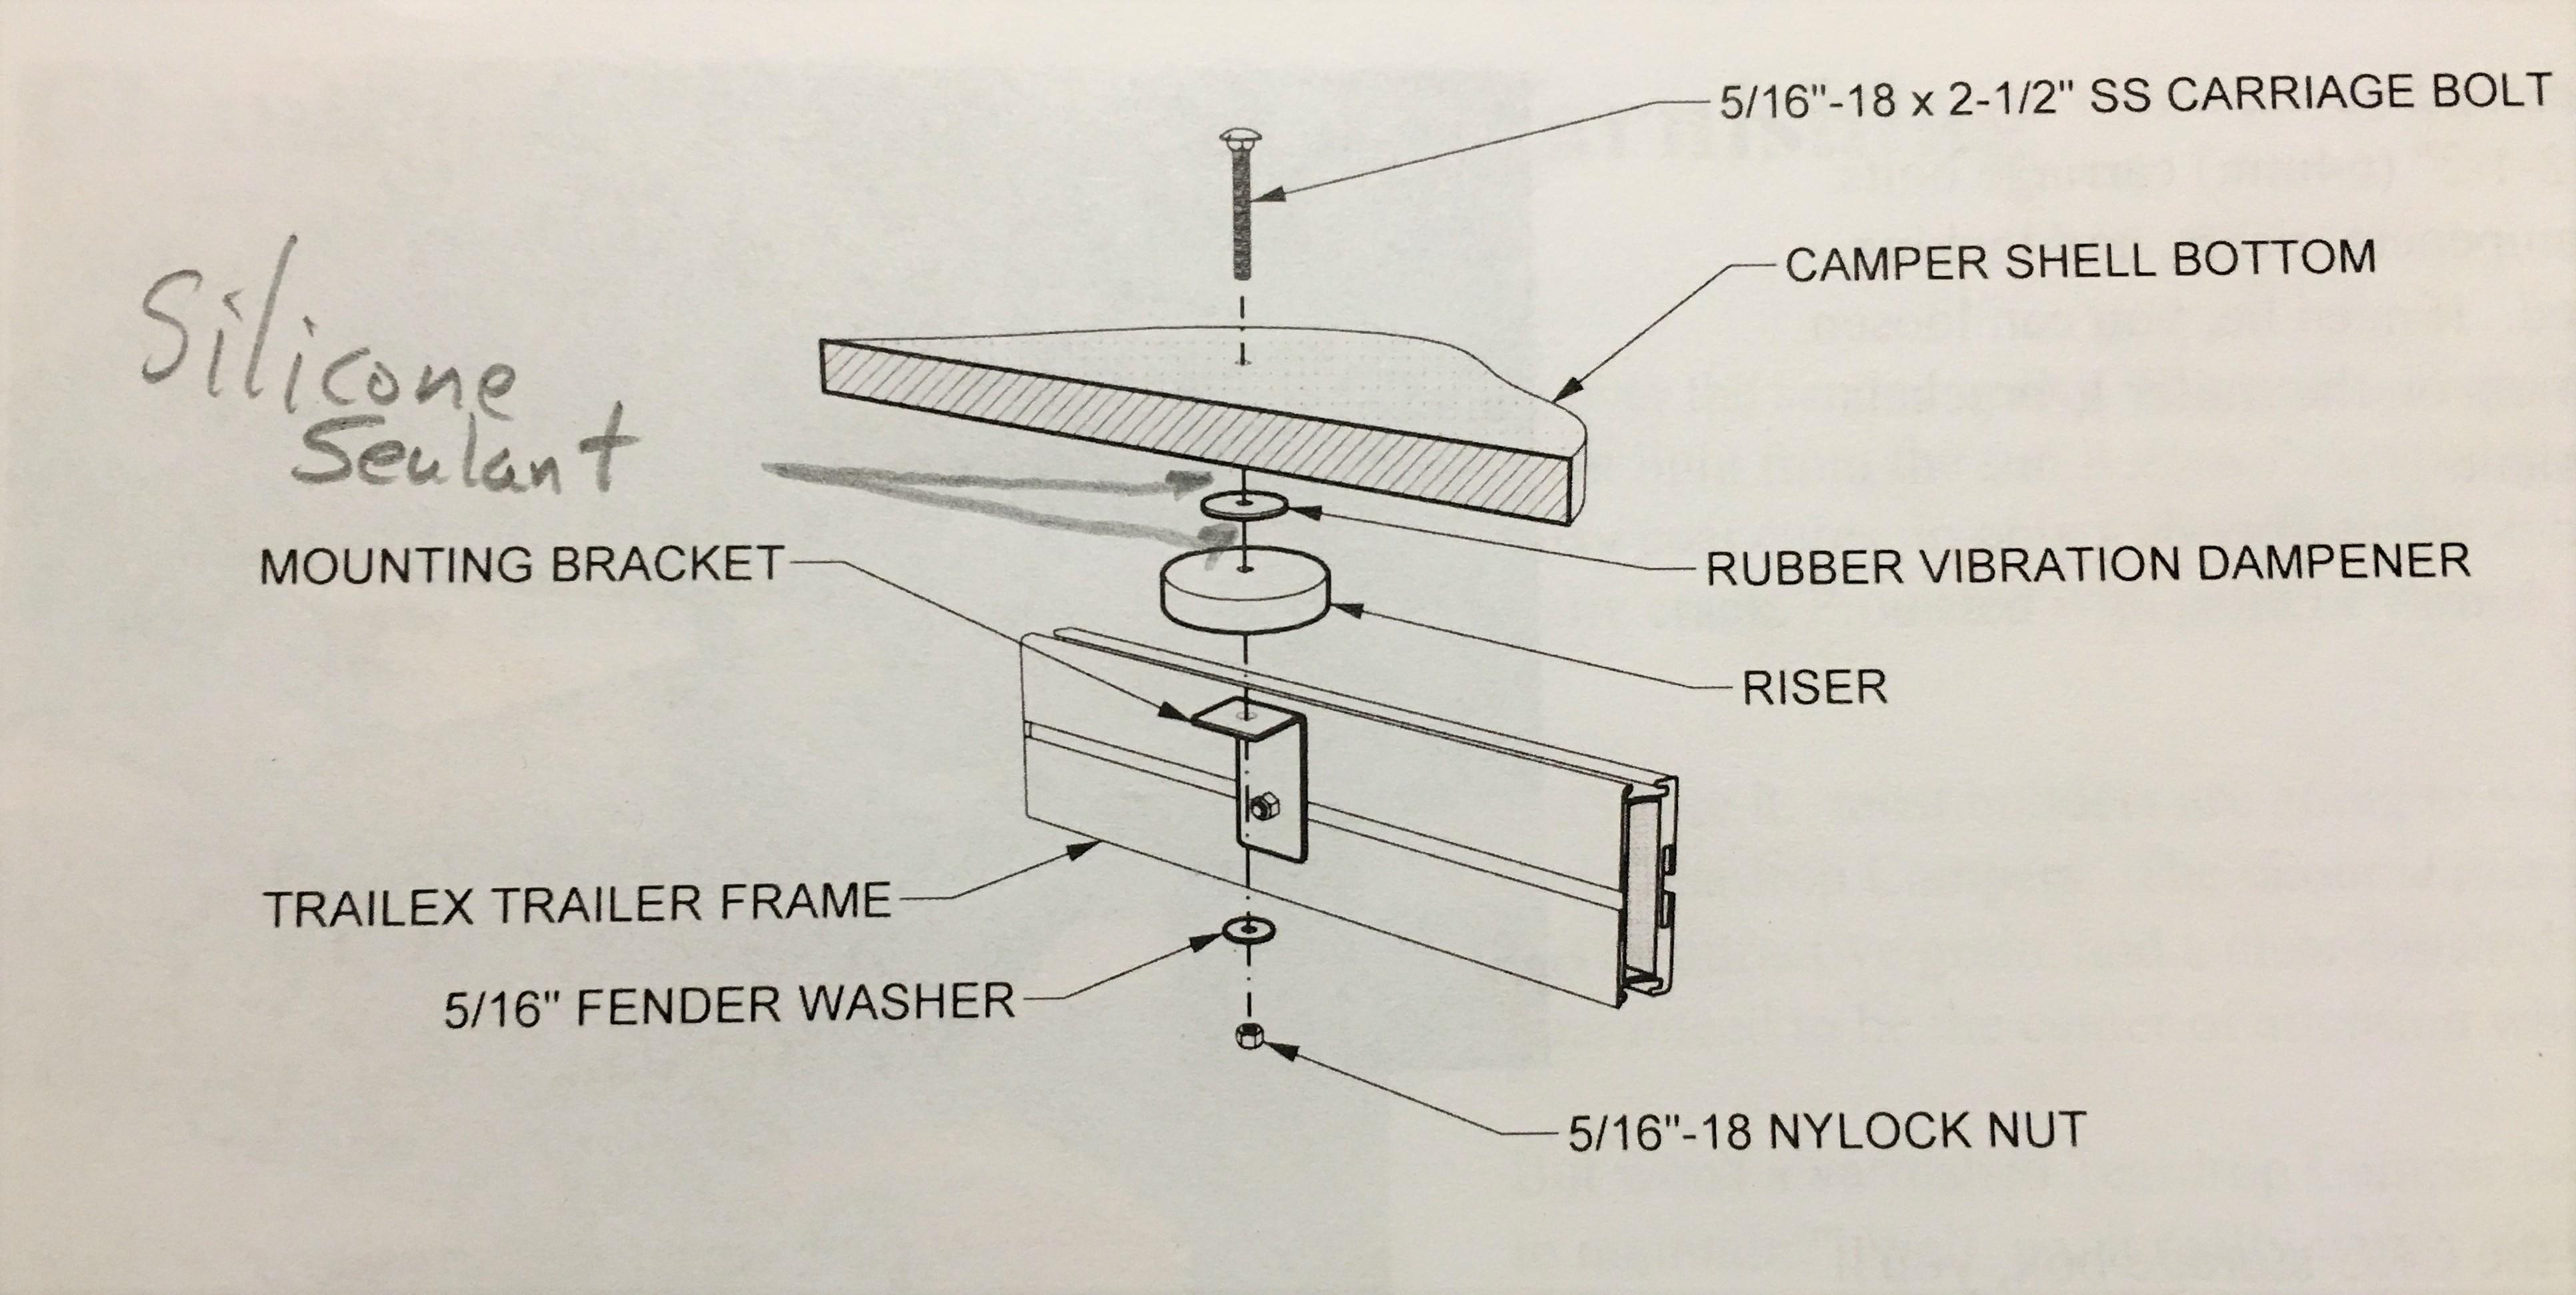
A second problem is that it is fairly difficult to get the riser and
rubber vibration dampener aligned with the bracket and camper shell
holes, especially if it is a tight fit and you don’t have a helper. My
solution was to apply marine grade silicone sealant between the riser
and vibration dampener the day before, while using a 3/8″ bolt to make
sure the holes are aligned, and using some pressure on the dampener to
mold the sealant nice and flat. To make it even easier, I
also applied sealant to the top of the dampener to hold it and the
riser in place (with the bracket loosely attached below) and simply dropped the bolts in. Here is a copy of the drawing from
the manual with my scribblings added:


No comments:
Post a Comment